OpenClaw is not simple software anymore; actually, it is starting to become a complete team for any internet company. Whether you need an SEO analyst or social media manager, it will deploy multiple dedicated agents for customer research, email marketing, product analysis, designing, and more.
Therefore, many SaaS founders realize that it’s not optional but only needed if they want to catch the hottest trend.
Installing OpenClaw on VPS requires a bit of coding knowledge. However, Kamatera has developed a 1-click OpenClaw app that makes life easy.
In the post, I will go through the simplest way to install OpenClaw on Kamatera with a full setup, including adding an AI model API key and connecting a messaging app.

At the end of the post, you will be able to chat with your OpenClaw system through WhatsApp or Telegram.
Table of Contents
Prerequisites
1. Putty for Windows and Terminal for Mac to connect with VPS via SSH.
2. Recommended specifications – it depends on the use case.
| Use Case | Recommended Specs | Best For |
|---|---|---|
| Personal assistant | 1 vCPU, 2GB RAM, 20GB NVMe SSD | Managing calendars, emails, and basic web browsing via API (Claude/GPT-4). |
| Developer | 2 vCPU, 4GB RAM, 50GB NVMe SSD | Code reviews, GitHub monitoring, and running multiple Docker containers. |
| Local intelligence | 4+ vCPU, 8GB+ RAM, 100GB NVMe SSD | Running local inference (Ollama/Llama 3) for 100% private data processing. |
| Enterprise gateway | 8+ vCPU, 16GB+ RAM, 200GB NVMe SSD | Orchestrating multiple agent swarms, heavy database logging, and high-traffic production webhooks. |
How to Install OpenClaw on Kamatera
The whole setup will take 10 minutes. To make it faster, instantly sign up with Kamatera, and you can claim a 30-day VPS trial with a $100 credit.
1. Log in to the Kamatera console.
2. At the right sidebar, head to My cloud> Create New Server
3. Select the nearest data center.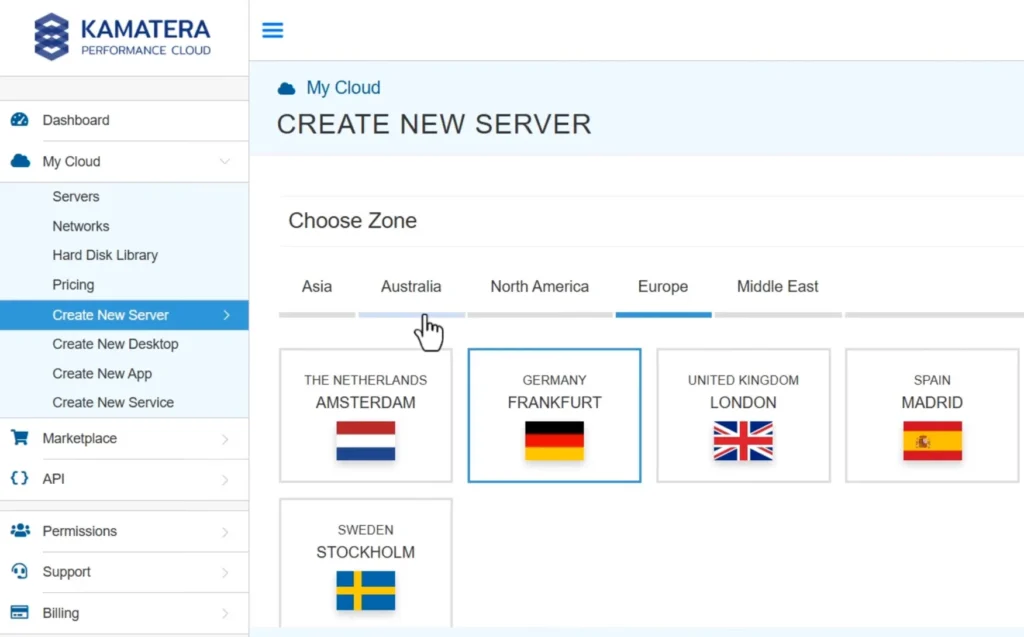
4. Choose the OpenClaw app under the app images section.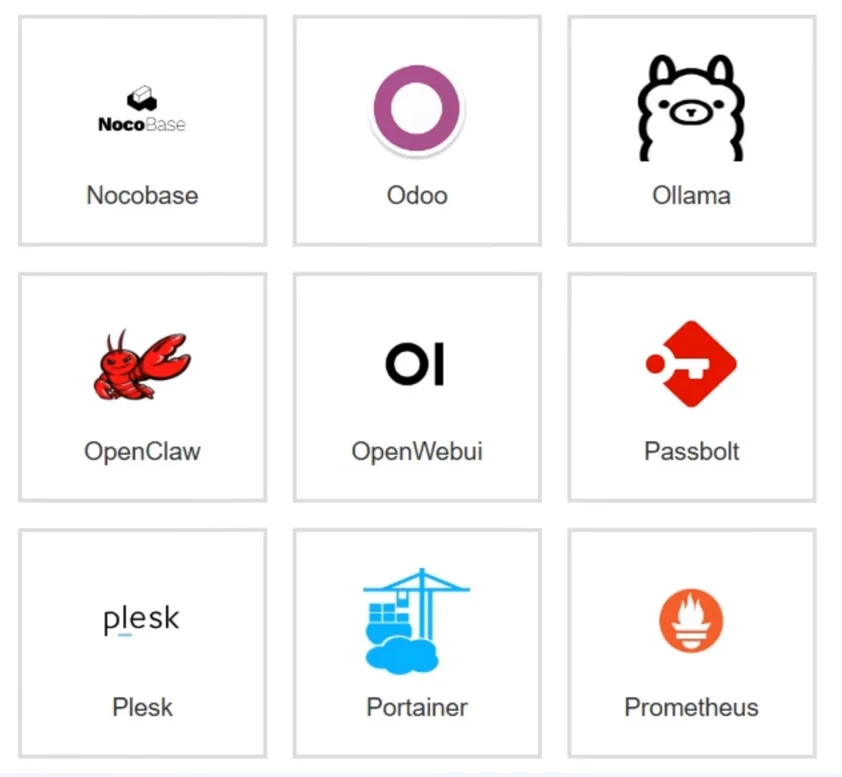
5. Choose a version.
6. Choose server specs.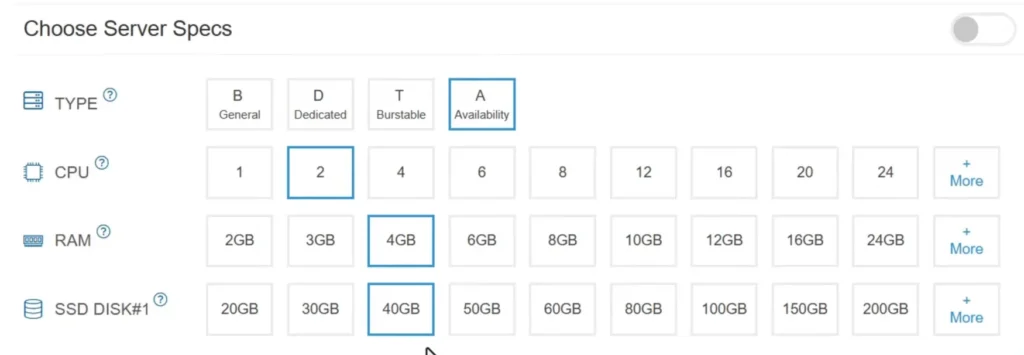
- Server Type – A (availability) (A is most affordable; you can choose general, dedicated, or burstable as per your purpose needs).
- CPU – 2 cores
- RAM – 4 GB
- SSD Disk – 40 GB
7. Set the server password and name.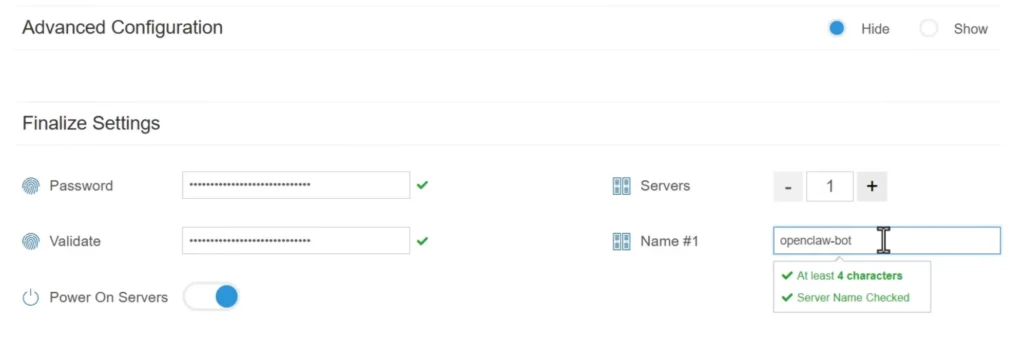
8. Select a monthly or hourly billing cycle if you need flexibility.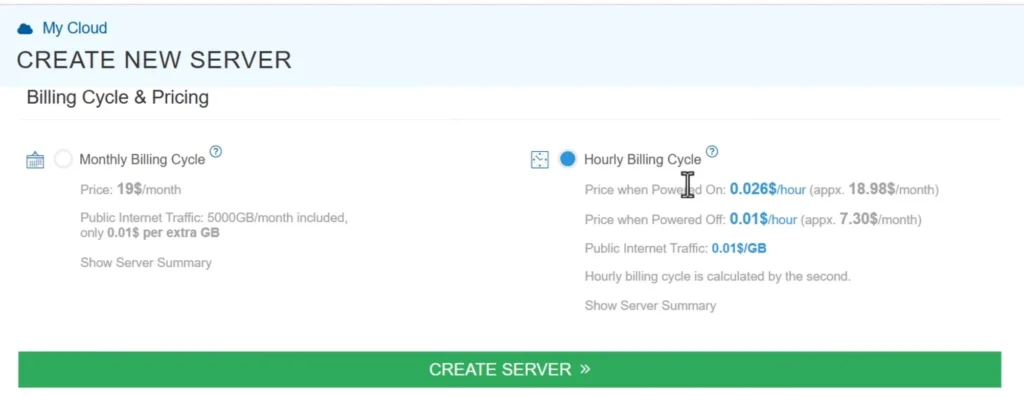
9. Hit create server.
Instantly, server installation will start, and it will take a few seconds to get completed.
How to Set Up OpenClaw
In the operation, you need Putty/terminal and the LLM API key. For the Claude API key, click and create your key.
1. Click on the server bar and copy your server IP.
2. Start PuTTY or the terminal, paste the server IP, and click “open.”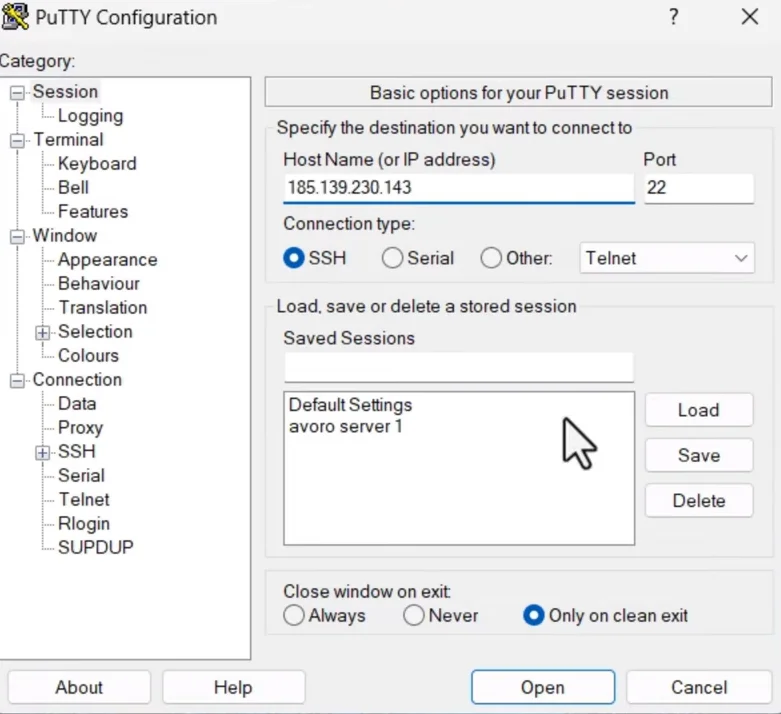
3. Enter the root password and press enter to log in to the server.
4. Copy Control UI (Web Dashboard) link.
5. Open it in the browser. You may face a non-SSL issue; go to Advanced > Proceed to web dashboard link.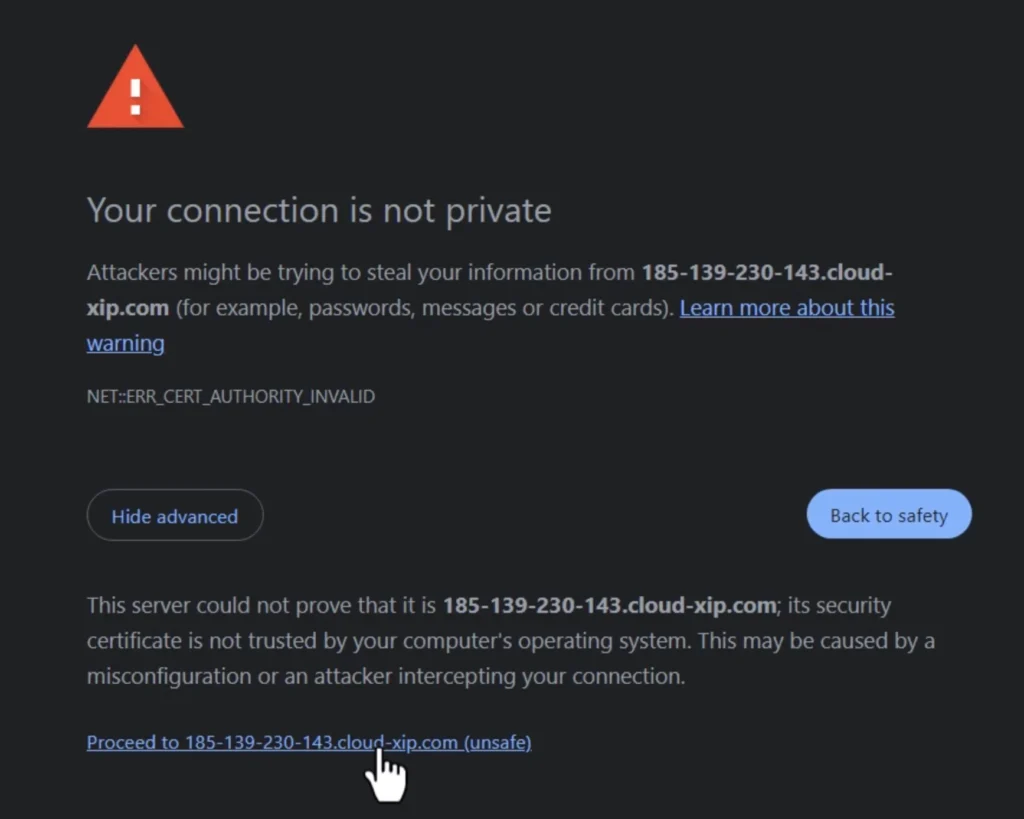
6. OpenClaw control dashboard will appear.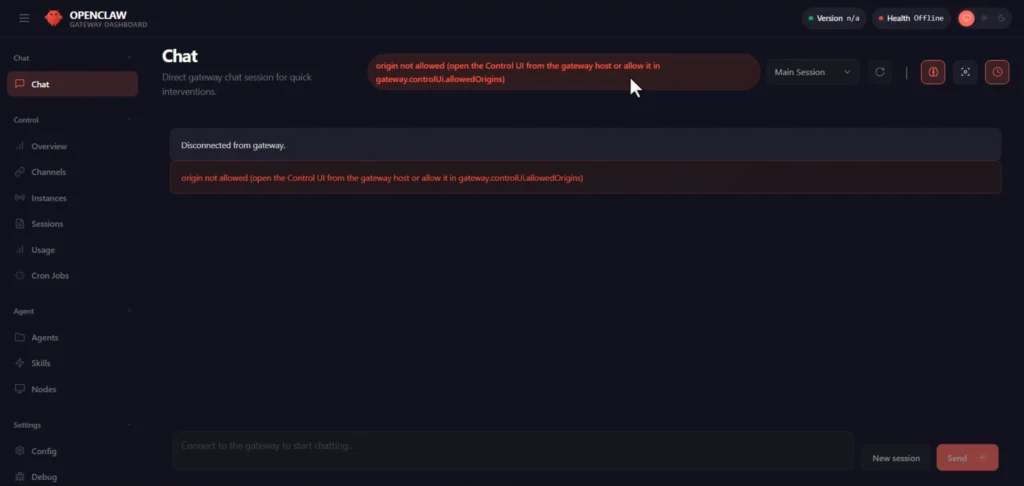
7. We need to allow origin. Paste the command into the SSH. (Don’t forget to replace your server IP and use only dashes for IP. You can find the link in your browser.)
openclaw config set gateway. controlui.allowedOrigins ‘[“https://185-139-230-143.cloud.xip.com”, “http://185-139-230-143.cloud.xip.com”]’
8. Restart the gateway to apply.
openclaw gateway restart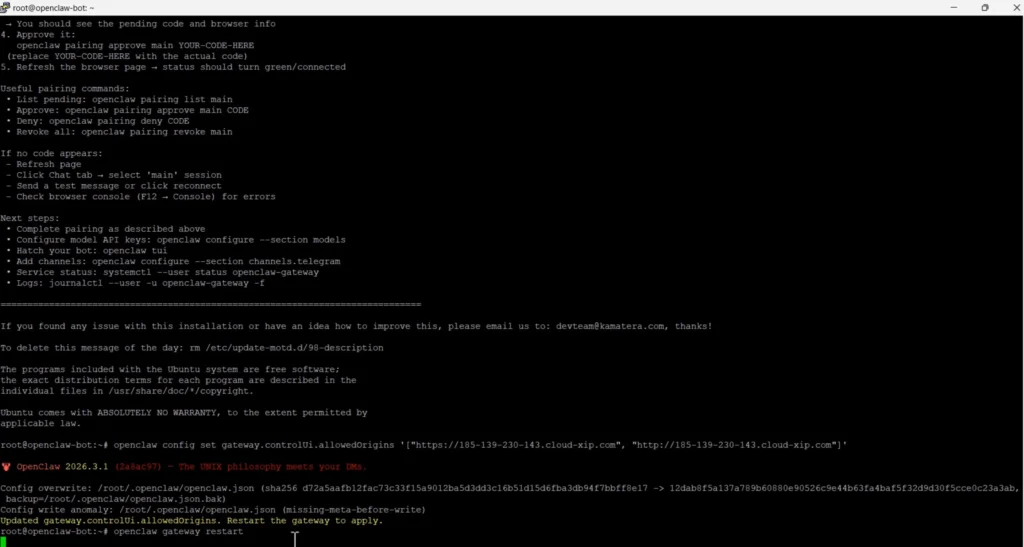
9. Pairing is required.  Run the command.
openclaw devices list
You will see a device with your local IP. 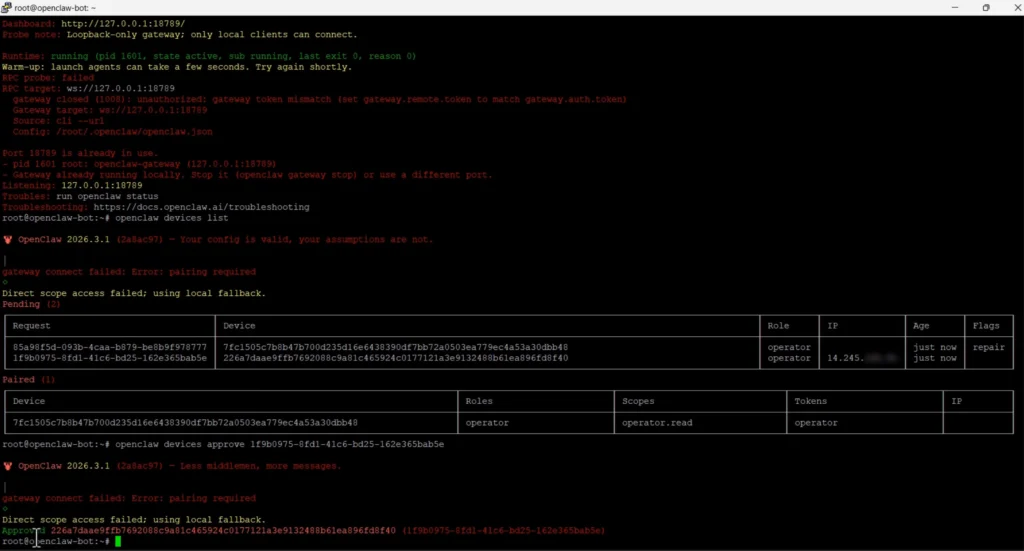 Copy that request ID.
Run the command.
openclaw devices approve [request ID]
Your device will be approved and under OpenClaw control; health is OK.![]()
10. It’s time to add an AI model to your OpenClaw. Copy your Claude API key. 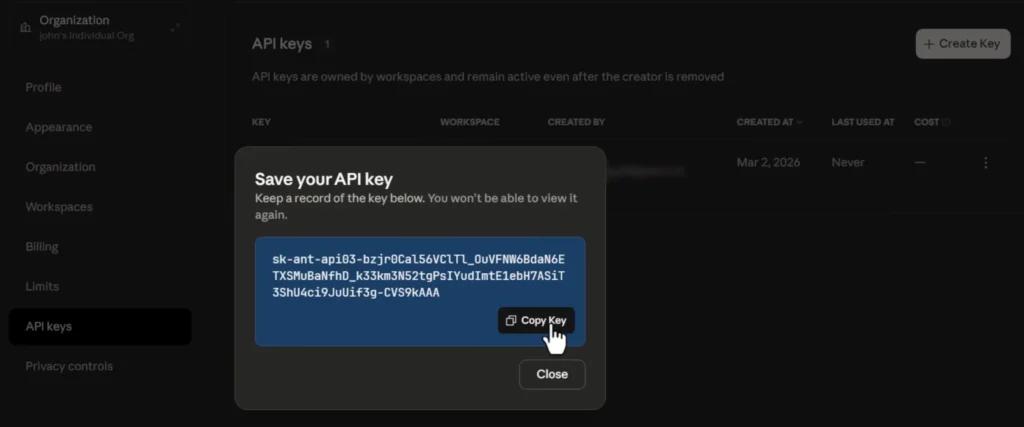 and run it
openclaw configure –section models
Select sections to configure.
Model
Model/auth provider
Anthropic
Anthropic auth method
Anthropic API key
How do you want to provide this API key?
Paste API key now.
Enter Anthropic API key.
Paste the Claude API key.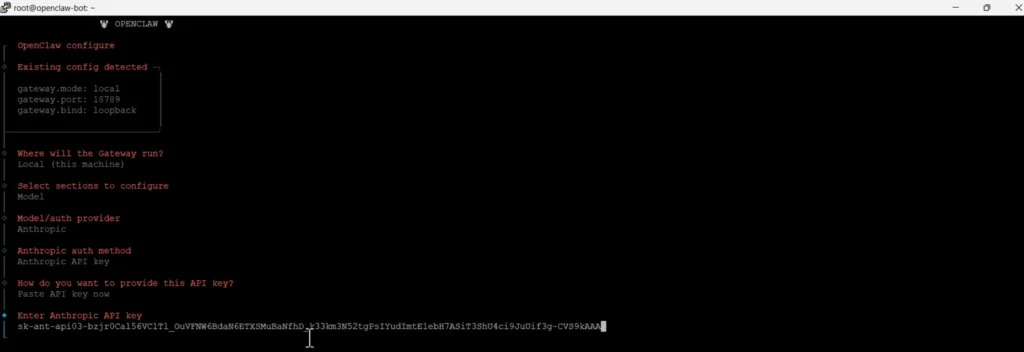
Now it will give a list of models; you need to choose any specific one and hit enter.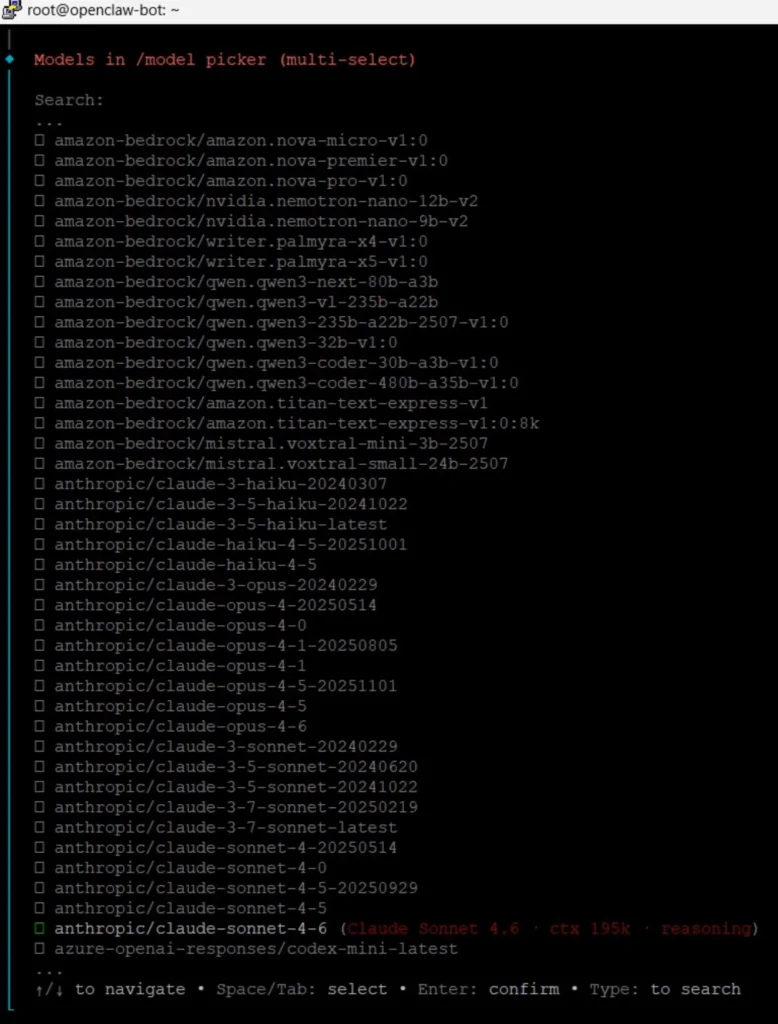
Go to continue and press enter. Model configuration has been done.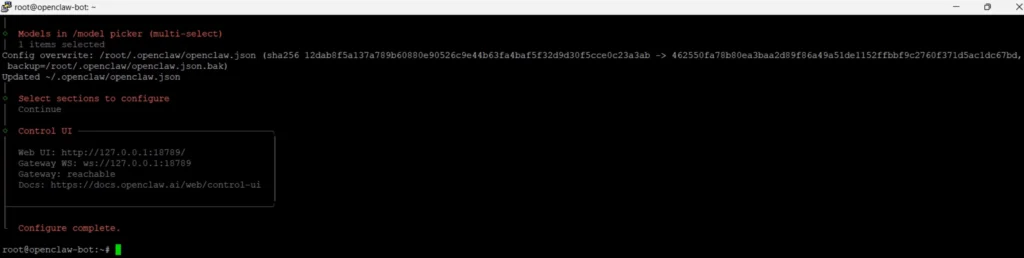
Now, to go to the OpenClaw web dashboard, start chatting with the model through the chat section.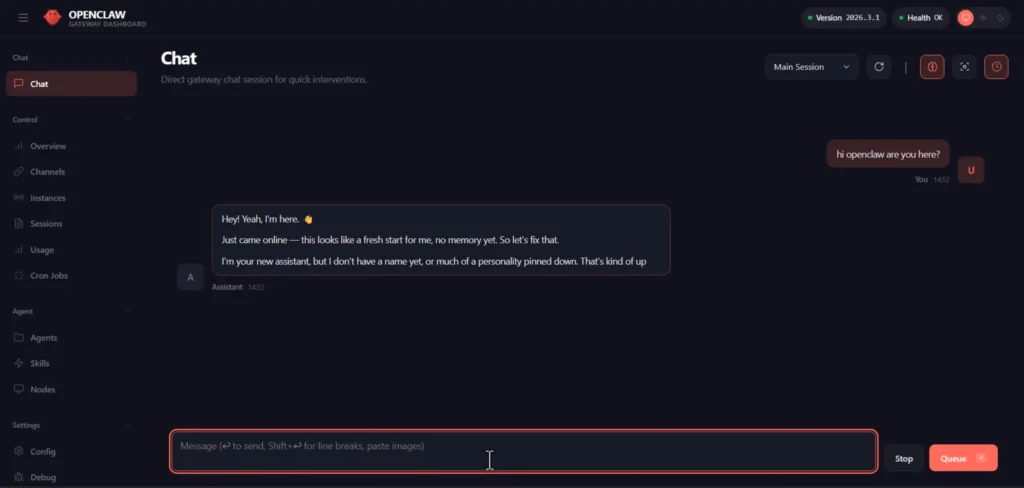
11. For setting up WhatsApp to OpenClaw, run it.
openclaw confire –section channels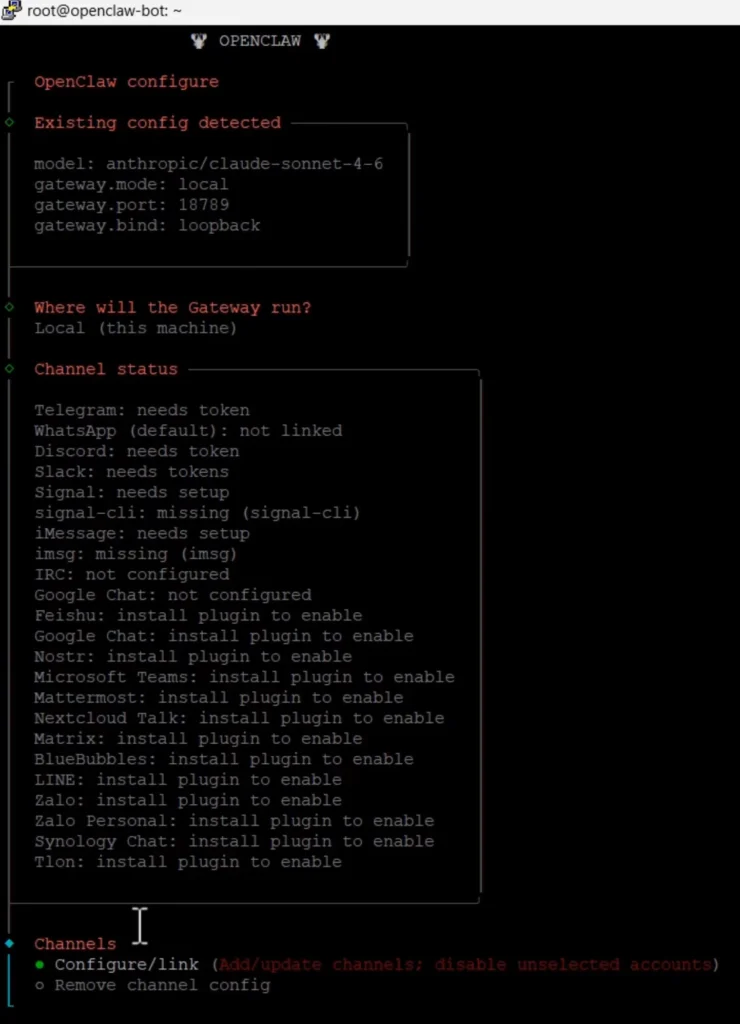
Where will the Gateway run?
Local (this machine)
Channel
configure/link
Select a channel.
WhatsApp (QR link)
Link WhatsApp now (QR)?
Yes
Scan the QR from your WhatsApp phone.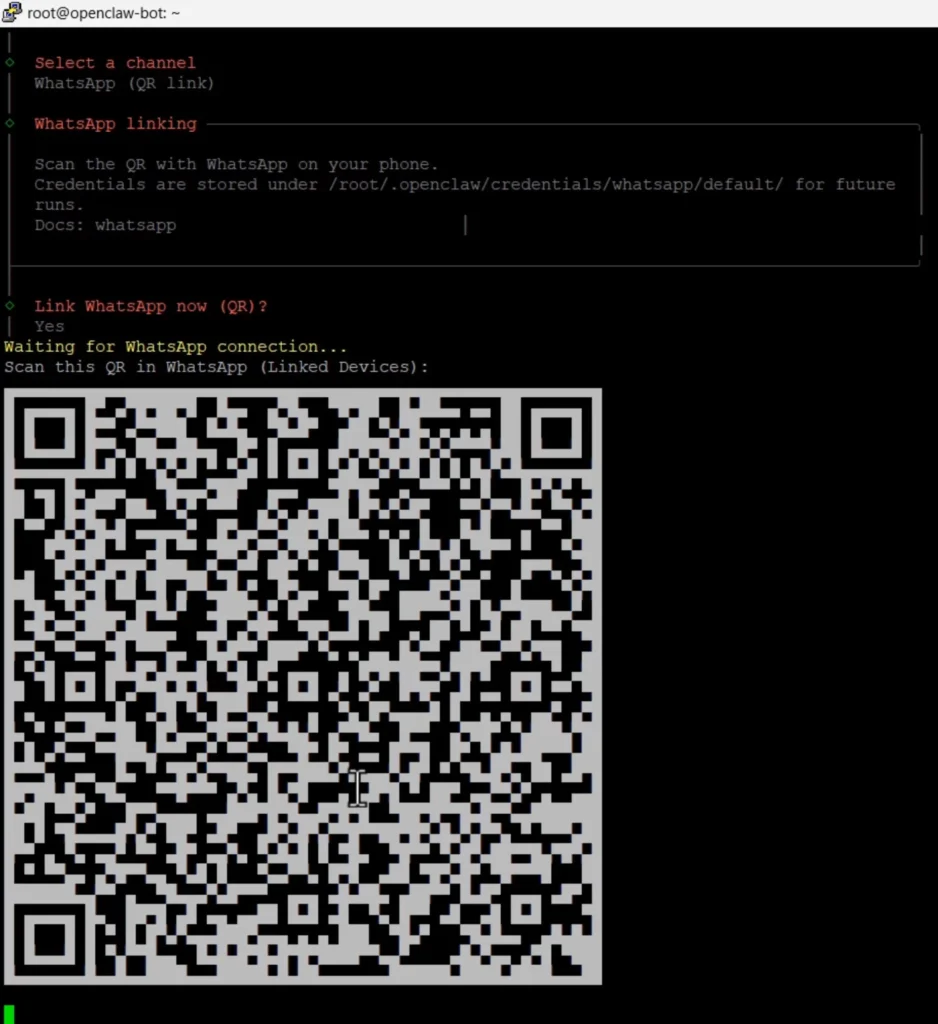
After scanning the code, your WhatsApp account will be linked.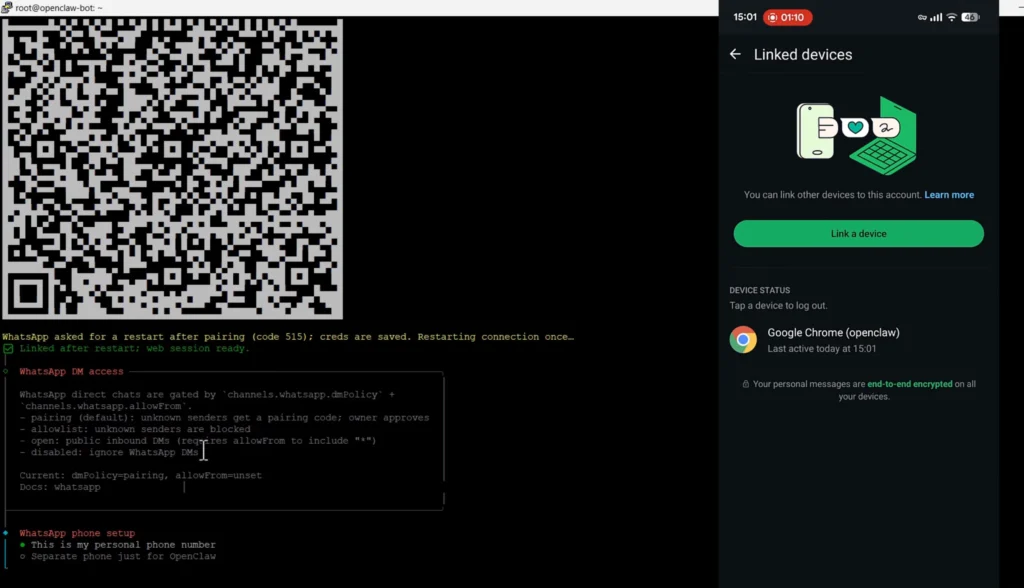
Whatsapp phone setup
This is my personal phone number.
Separate phone just for OpenClaw (recommended)
Your personal Whatsapp number (the phone will message from)
+12324454535
Select a channel.
Finished.
WhatsApp device linking configuration has been fulfilled.
Now you can chat with OpenClaw through your WhatsApp phone.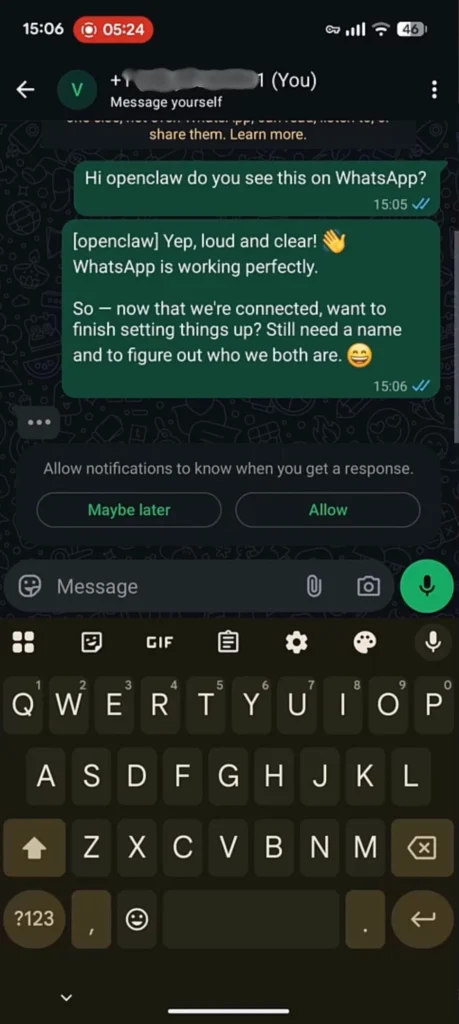
FAQ
1. What are the minimum requirements to run OpenClaw on a VPS?
OpenClaw can run on a basic VPS with 1 vCPU, 2GB RAM, and 20GB SSD for personal use. However, for better performance and multitasking, at least 2 vCPU and 4GB RAM are recommended.
2. Is coding knowledge required to install OpenClaw on Kamatera?
No, advanced coding skills are not required. Kamatera provides a 1-click OpenClaw app, which simplifies the installation process significantly. Basic SSH usage is enough to complete the setup.
3. Can I connect OpenClaw to WhatsApp or Telegram?
Yes, OpenClaw supports integration with messaging platforms like WhatsApp and Telegram. You can link your account by scanning a QR code and start interacting with your AI agents directly.
4. Which AI models can be used with OpenClaw?
OpenClaw supports multiple AI providers such as Anthropic (Claude). You just need to add your API key and select the model during configuration to start using it.
Ravi Kumar is a Server Performance Analyst with over 4 years of experience benchmarking cloud infrastructure. He has optimized and stress-tested over 150+ websites, digging deep into uptime, disk latency, and CPU performance. Whether you’re looking for a free trial or a high-performance production server, Ravi uses real-world data to help you find the perfect host.