Sign up now for VPSServer Free Trial and get →
Coupon code: Auto-applied in the button below.
VPSServer is an emerging affordable cloud VPS provider powered by enterprise-grade infrastructure.

The cloud platform provides both Linux and Windows OS to launch app servers, web servers, forex servers, and RDP servers.
All of it comes with a 99.95% uptime SLA and cloud firewall protection. However, you can enable their server backup, making a strong backup against any data failure. It has 20+ global data centers with N+1 redundancy.
All of these, you can test with a free hand for 30 days. You need to grab the deal above.
Table of Contents
How To Claim VPSServer Free Trial
For grabbing the offer, you need to make a new account. But you should make sure to have a valid credit card.
Then, the sign-up process will be quite smooth. Now follow the below steps.
1. First of all, visit the “active now” link above.
2.Click on the Start your free trial now! button.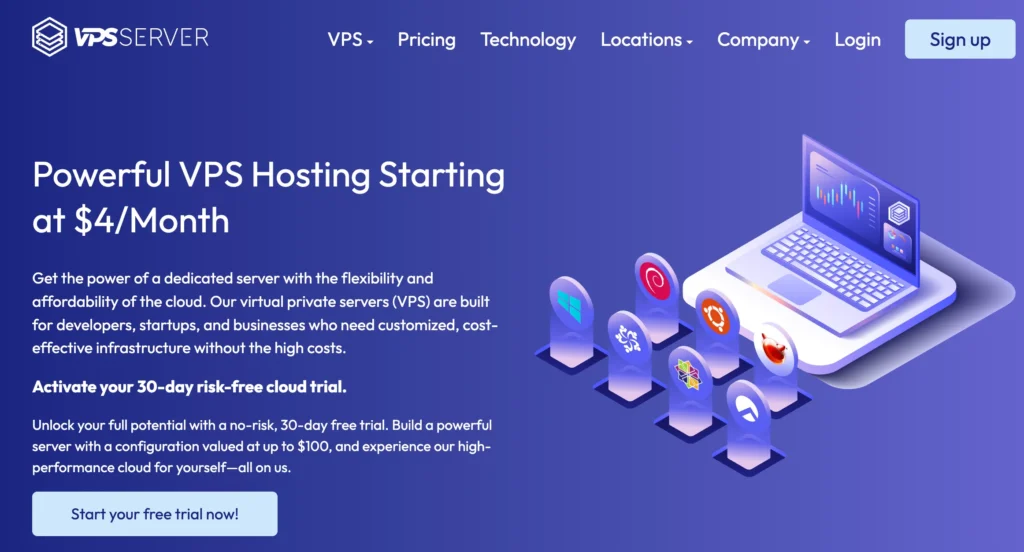
3. Fill in your email address, set a new password, and click Go.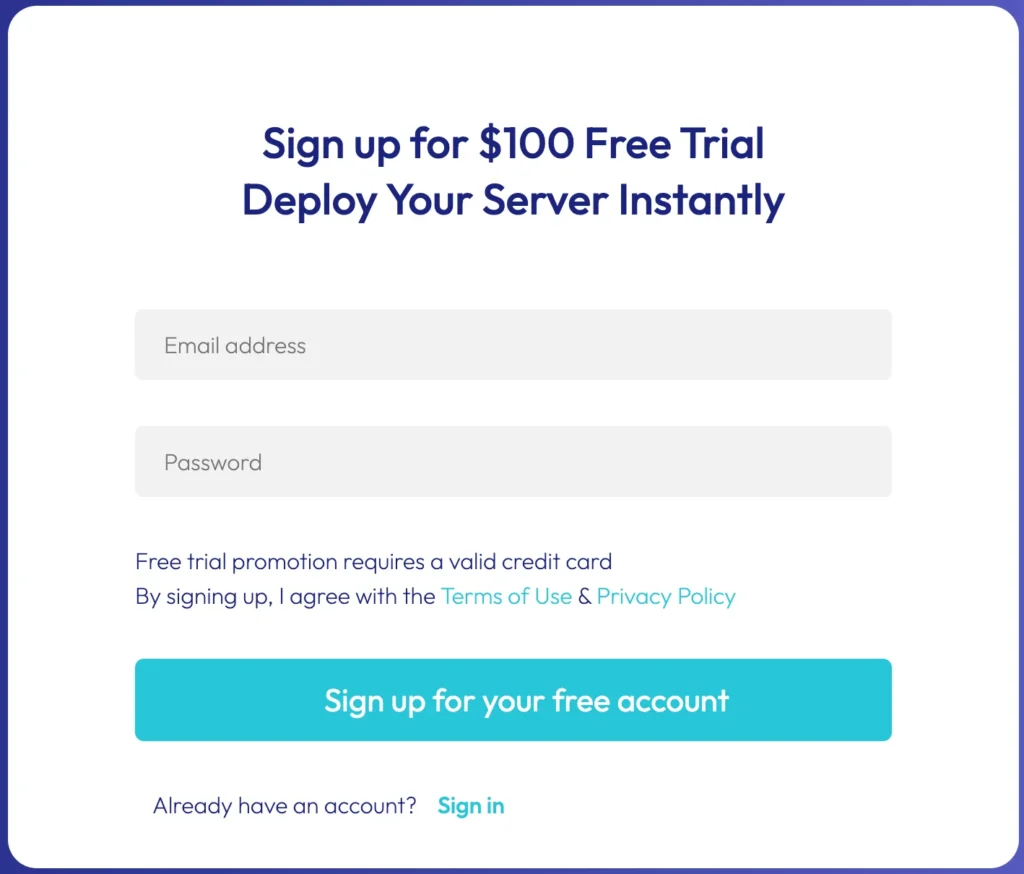
4. You need to verify your email address.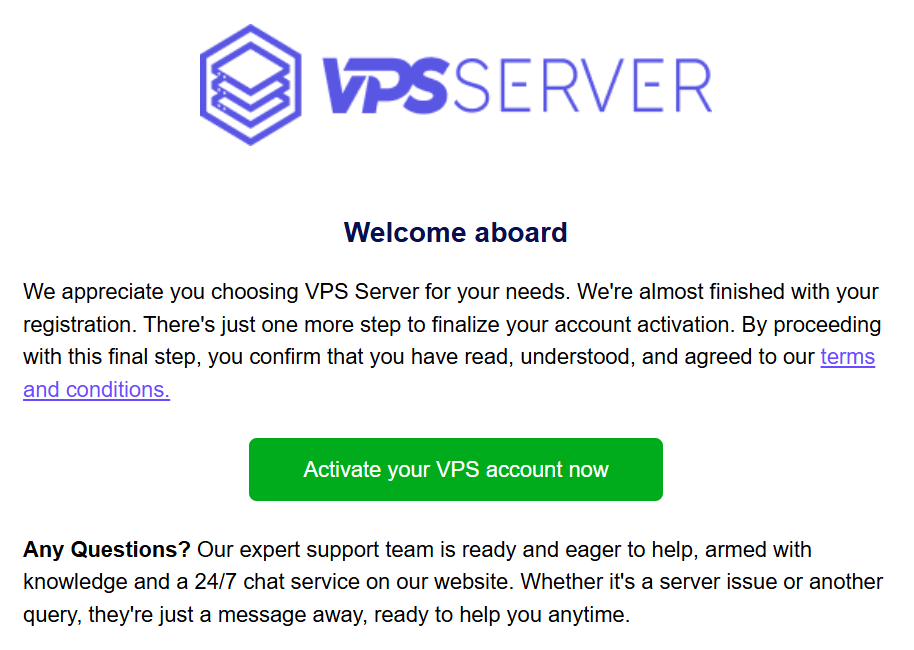 Check your mail and click on the verification link.
5. Your email address will be verified, and you will be redirected to the VPSServer Management Console.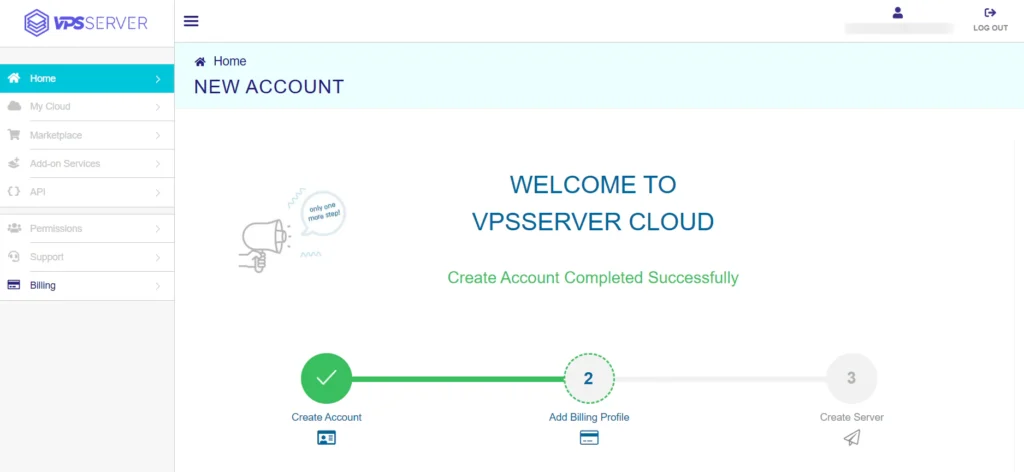
6. Now complete the billing profile. It is divided into four sections.
Account Information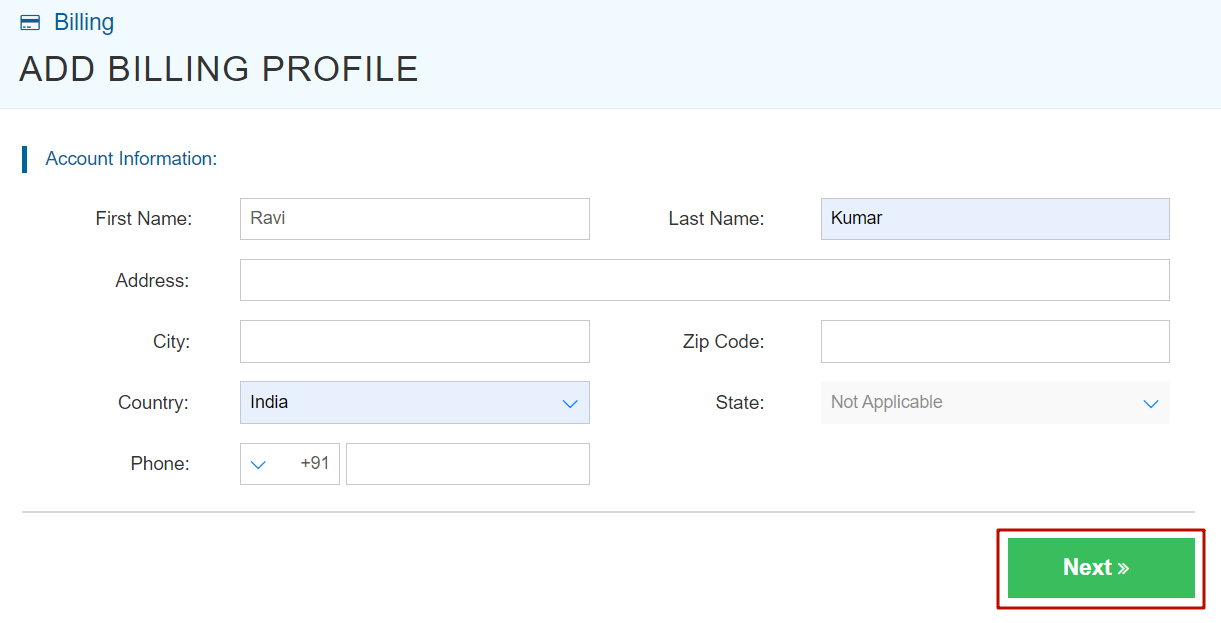
In the section, fill in your name, address, zip code, and phone number.
Phone Verification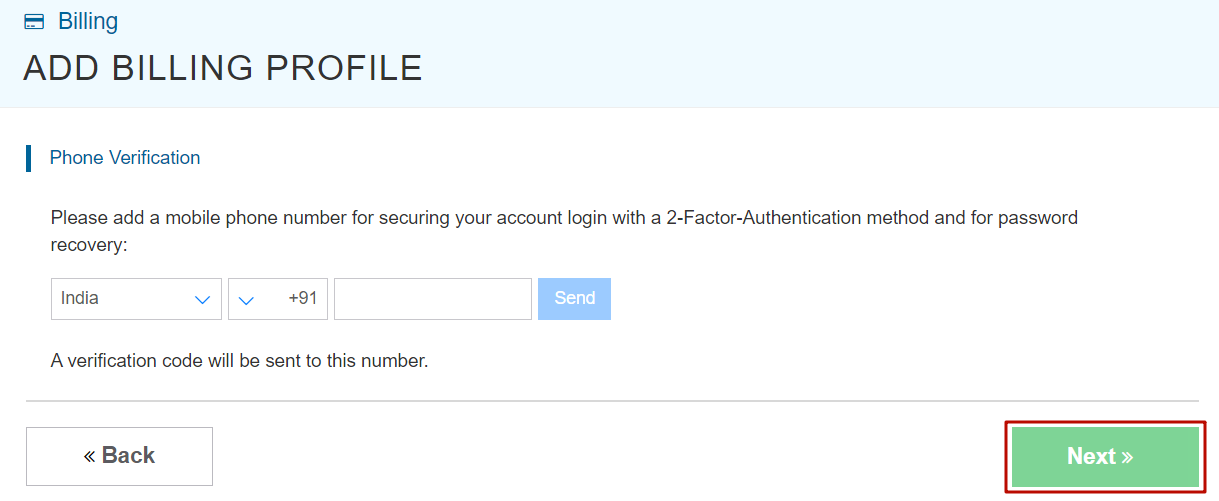
Enter your phone number and verify it. It will enhance the security of your account.
You can log in with 2-factor authentication securely.
Promo code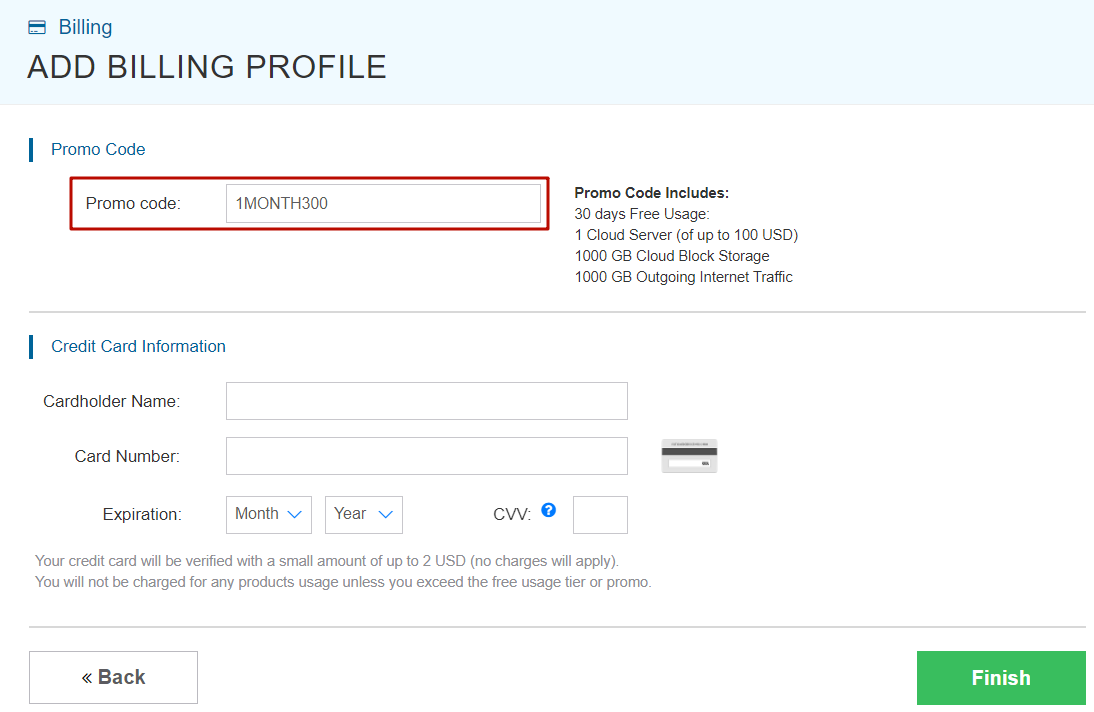
No action is needed from you; 1MONTH300 promo code will be applied automatically.
Credit Card Information
Provide your card information, including the cardholder name, card number, expiration date, and CVV.
After filling in all the details, click Finish.
It will charge up to $2 from your credit card for payment method verification, and they will reverse the amount in the next few seconds.
Now your VPSServer account is fully ready, and you can launch your first cloud server.
What Do You Get in the VPSServer Free Trial?
You will get the following things:
What Can You Do Under the VPSServer Free Trial?
There are various things you can do with the offer.
Who Should Opt for VPSServer’s Free Trial
In simple terms, those who need performance on budget should go for it, whether they are bloggers, students, or startup founders.
Blogger – After a time, a blog grows, gets a high amount of traffic, and shared resource servers feel under pressure. At the moment, dedicated resources are essential and match the growth need. I always recommend, not after a certain amount of growth, choosing a VPS from the beginning. In the market, there are a lot of affordable VPS available.
Developers – Developing is a resource-hungry and complete-port-accessible process. A VPS has all of this. VPSServer allows customizing RAM, CPU, and storage as your application requires.
Startups – In most cases, running a startup application or website requires performing simultaneous multiple operations needing enormous server infrastructure and peak data security. The cloud platform has designed its server for enterprises and startups.
Students – An aspiring career in cloud infrastructure needs to start from the first phase of a cloud platform that is absolutely a cloud VPS. At the platform, you can deploy 50+ one-click apps with over 7 Linux OSs. At Windows server, you can deploy Forex and RDP to know about distant system controlling and freelancing.
VPSServer Pricing
The platform provides three types of servers with highly customizable CPUs, RAM, and NVMe that make you combine anything with anything, like a 32-core CPU, 512 MB RAM, and 20 GB NVMe. I mean, you can do thousands of types of server configurations, and pricing is being set on that basis. Here, we’re presenting plans of our combination.
Starter Server Plans (Type A)
It is best for small projects that can handle variable levels of CPU performance, like blogs and web apps. The size of RAM goes up to 128 GB, storage to 4 TB, and the CPU to 32 cores.
| RAM | CPU | Storage | Bandwidth | Price |
| 512 MB | 1 Core | 20 GB NVme | 5 TB | $4/mo |
| 1 GB | 1 Core | 20 GB SSD | 5 TB | $4/mo |
| 1 GB | 2 Cores | 20 GB SSD | 5 TB | $8/mo |
| 2 GB | 2 Cores | 20 GB SSD | 5 TB | $10/mo |
| 3 GB | 2 Cores | 30 GB SSD | 5 TB | $15/mo |
| 4 GB | 2 Cores | 50 GB SSD | 5 TB | $20/mo |
| 4 GB | 4 Cores | 50 GB SSD | 5 TB | $50/mo |
Standard Server Plan (Type B)
It derives high-performance virtual machines with a good balance of memory and dedicated hyper-threads from best-in-class Intel chips. It is a good choice for production websites, e-commerce sites, and enterprise applications.
| RAM | CPU | Storage | Bandwidth | Price |
| 512 MB | 1 Core | 20 GB NVme | 5 TB | $9/mo |
| 1 GB | 1 Core | 20 GB SSD | 5 TB | $9/mo |
| 1 GB | 2 Cores | 20 GB SSD | 5 TB | $19/mo |
| 2 GB | 2 Cores | 20 GB SSD | 5 TB | $25/mo |
| 3 GB | 2 Cores | 30 GB SSD | 5 TB | $34/mo |
| 4 GB | 2 Cores | 50 GB SSD | 5 TB | $43/mo |
| 4 GB | 4 Cores | 50 GB SSD | 5 TB | $68/mo |
Enterprise Server Plan (Type D)
It is best for enterprise-intensive applications like video rendering, machine learning, and ad serving, as it is a compute-optimized virtual machine with dedicated hyper-threads
| RAM | CPU | Storage | Bandwidth | Price |
| 512 MB | 1 Core | 20 GB NVme | 5 TB | $19/mo |
| 1 GB | 1 Core | 20 GB SSD | 5 TB | $19/mo |
| 1 GB | 2 Cores | 20 GB SSD | 5 TB | $44/mo |
| 2 GB | 2 Cores | 20 GB SSD | 5 TB | $50/mo |
| 3 GB | 2 Cores | 30 GB SSD | 5 TB | $59/mo |
| 4 GB | 2 Cores | 50 GB SSD | 5 TB | $68/mo |
| 4 GB | 4 Cores | 50 GB SSD | 5 TB | $118/mo |
VPSServer Data Center
It has widely 24 global data centers, enabling maximum possible fast latency in each corner of the world.
- Seattle, USA
- Sillicon Valley, USA
- Los Angeles, USA
- Chicago, USA
- Dallas, USA
- Miami, USA
- Altanta, USA
- New York, USA
- Toronto, Canada
- London, England
- Amsterdam, Netherlands
- Madrid, Spain
- Milan, Italy
- Stockholm, Sweden
- 4 Tel Aviv, Israel
- Singpore
- Hong Kong, China
- Tokyo, Japan
- Sydney, Australia
FAQ
1. Does VPSServer really offer a 30-day free trial?
Yes, VPSServer offers a 30-day free trial for new users. During the trial period, you receive $100 free hosting credit that can be used to deploy cloud VPS servers. This allows you to test the platform’s performance, dashboard, and infrastructure without paying for the server usage initially.
2. Do I need a credit card to claim the VPSServer free trial?
Yes, a valid credit card is required to activate the VPSServer free trial. The platform may temporarily charge a small amount (usually up to $2) for payment verification, which is automatically refunded within a few seconds. This process helps prevent spam accounts and ensures secure billing.
3. What resources do I get with the VPSServer free trial?
With the VPSServer trial, you get several cloud features, including:
- $100 free hosting credit
- 30 days free usage
- 1 cloud server
- 1 TB cloud block storage
- Up to 5 TB outgoing bandwidth
- 15 server creation frequency
- Access to 100+ one-click apps like WordPress, Joomla, and Drupal
These resources are enough to test web hosting, application deployment, or development environments.
4. Can I run websites or applications during the VPSServer free trial?
Yes, you can fully use the trial to deploy websites, web applications, VPN servers, RDP servers, or development environments. The platform supports both Linux and Windows operating systems, making it suitable for bloggers, developers, startups, and students who want to experiment with cloud infrastructure.
5. What happens after the VPSServer free trial ends?
After the 30-day trial or when the $100 credit is used, your services will continue only if you upgrade to a paid plan. If you decide not to continue, you can simply stop or delete your servers to avoid further charges.
Ravi Kumar is a Server Performance Analyst with over 4 years of experience benchmarking cloud infrastructure. He has optimized and stress-tested over 150+ websites, digging deep into uptime, disk latency, and CPU performance. Whether you’re looking for a free trial or a high-performance production server, Ravi uses real-world data to help you find the perfect host.